
Maintaining the optimal performance and longevity of your nebulizer diffuser is crucial for ensuring the continuous delivery of therapeutic mists essential for enhancing air quality and personal well-being. Proper cleaning is not only integral to the functionality of your device but also to preserving the purity of the aromas it disperses. This article offers a comprehensive guide, meticulously outlining step-by-step procedures to clean your nebulizer diffuser effectively. Our clear-cut instructions are designed to help you preserve your device’s efficacy while protecting you from potential contaminants, making sure every breath you take remains as refreshing and beneficial as intended. Join us as we delve into the best practices for keeping your nebulizer diffuser in pristine condition.
Step-by-Step Cleaning Process
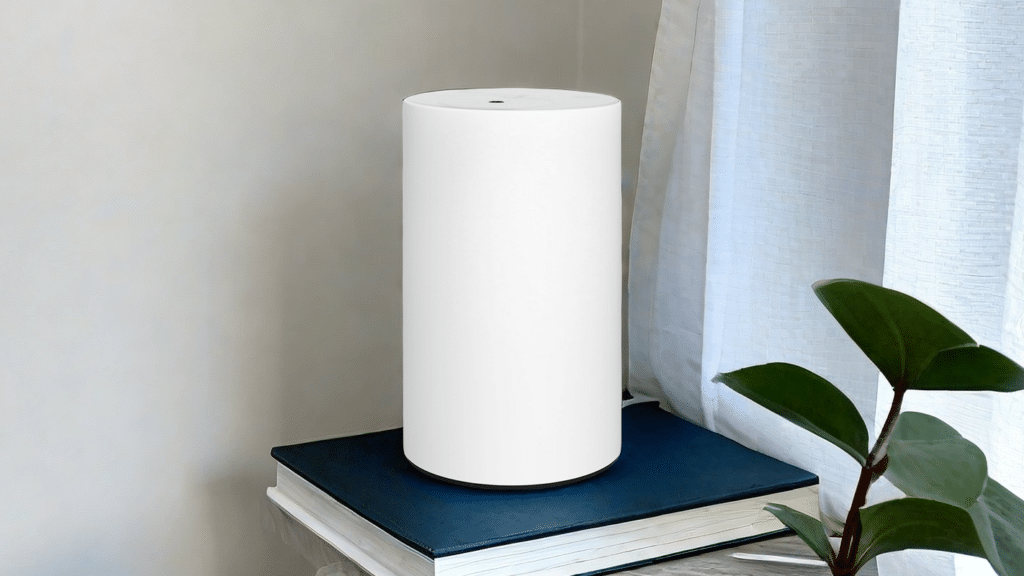
1.Disassembling the Diffuser
Before initiating the cleaning process, it is pivotal to disassemble your nebulizer diffuser properly to ensure all parts are thoroughly cleaned without causing damage.
Begin by unplugging the device from any electrical source to avoid safety hazards.
Next, remove the outer shell or cover of the diffuser, which usually involves gently twisting or lifting it off, depending upon the design of your model.
After you have access to the interior, locate and detach the nebulizer cap or nozzle, depending on your unit’s configuration. This piece oftentimes can be pulled straight up or unscrewed with minimal effort. Proceed carefully as this part is integral to the nebulization process and tends to be delicate.
With these components set aside, extract any internal reservoirs or containers that hold essential oils. Many designs feature a small tank or bottle that can simply be lifted out of its housing within the diffuser. Handle this container with care, ensuring not to spill any residual oils.
Lastly, check for smaller pieces such as seals or gaskets that may also require cleaning. It’s imperative during this stage to take note of where each part fits; these elements provide crucial barriers and maintain effective operation once reassembled.
By dismantling your nebulizer diffuser following these methodical steps, you are now prepared to clean all individual parts effectively and preserve the functionality of your device. Always refer to your specific model’s user manual for detailed instructions tailored to your diffuser, keeping in mind that disassembly methods may vary slightly across different units.
2.Cleaning the Nebulizer
Carefully remove the nebulizer from its holding area, typically made evident by the manufacturer’s design.
Once you have access to the nebulizer, use a soft brush or a cloth to gently wipe away any oil residue from its surface. For more persistent or thick deposits, dampen your cloth with warm water and a mild detergent; avoid using harsh chemicals as they may damage sensitive components. If your nebulizer has small openings or intricate parts, you can use a cotton swab to reach these areas.
Rinse thoroughly with warm water afterward to make sure no cleaning solution remains. Be cautious during this step—water entering certain parts of the nebulizer might cause damage.
After rinsing, carefully shake out excess water from the nebulizer component.
Finally, let the nebulizer air dry completely before attempting to use or reassemble your diffuser. Providing ample time for drying helps prevent any possible issues caused by moisture remaining in the machine.
Throughout this process, handle all elements softly to avoid breakage and consult your manufacturer’s guide for specific instructions related to your model, as some components may have unique requirements for care and cleaning.
3.Washing Removable Parts
Soak all non-electrical washable parts in warm soapy water. Use mild detergent to avoid potential erosion of materials or residual odors that could affect the aromatic output during subsequent uses. Employ a soft brush or cloth to scrub away oil residues and deposits gently. For hard-to-reach areas, a cotton swab can be an effective tool for removing buildup without introducing abrasion.
4.Rinsing and Drying
Once the nebulizer diffuser’s components have been thoroughly cleaned, it is imperative to rinse them properly to ensure that no cleaning residue remains. Begin by running warm water over the parts, paying special attention to any areas where soap or cleaners were applied. The objective is to remove all traces of cleaning agents, as leftover residue could affect the performance of your diffuser or potentially mix with essential oils during future use, altering their fragrance and properties.
After rinsing is complete, shake off excess water from the components gently but firmly. This step helps prevent water spots and ensures that no unnecessary moisture remains which could potentially harbor bacteria or mold growth. Proceed to lay out all the parts on a clean towel or a drying rack in an area with good air circulation; this aids in speeding up the drying process. Allow all parts to air dry completely before you reassemble the diffuser. This may take several hours, so patience is key here—never attempt to reassemble and use the diffuser while any parts are still damp.
Avoid using heated implements such as hair dryers or placing components in direct sunlight for drying, as excessive heat may warp or damage some parts of your nebulizer diffuser. Proper rinsing and drying not only help maintain your diffuser’s functionality but also extend its lifespan by preventing issues related to water damage or microbial contamination.
5.Reassembling the Diffuser: Tips for Reassembling the Diffuser After Cleaning
Place the nebulizer back into its designated location carefully. It should fit snugly without any force. If there are gaskets or seals, check their integrity and replace them if they show signs of wear or damage. These are vital in maintaining an airtight seal and preventing any leaks of essential oils into areas where they could cause damage.
Proceed to attach any nozzles or tubes that were removed prior to cleaning. Make sure these parts firmly connect with their respective outlets. Next, place any removable parts such as glass caps or covers back onto the diffuser body, ensuring they’re correctly aligned and secure.
Finally, once all parts are accurately positioned, gently press or screw them together according to the manufacturer’s instructions. Avoid over-tightening which could cause breakage but ensure that every element is securely assembled so that no loose parts can disrupt its performance.
Reassembling your nebulizer diffuser with attention and care will help maintain its longevity and efficiency, allowing you to enjoy the benefits of your aromatherapy experiences without interruption. Always refer to your specific model’s manual for detailed instructions tailored to your device as this guide may not encompass all design variations.
Why Clean Your Nebulizer Diffuser?
1.Importance of maintaining cleanliness for optimal performance.
The effectiveness and longevity of a nebulizer diffuser rely heavily on regular maintenance. Keeping your device clean not only ensures that it operates at peak efficiency but also plays a pivotal role in safeguarding your health. Residual essential oils can become sticky and act as a magnet for dust and debris, which can impede the diffuser’s performance. Moreover, if not cleaned properly, the moist environment inside a nebulizer diffuser can become an ideal breeding ground for bacteria and mold, posing potential health risks.
Without regular cleaning, the fine mist produced may carry harmful microorganisms or even cause the diffuser to work less effectively, which means you won’t receive the full benefit from the essential oils being used. Therefore, to maintain a pure aromatherapy experience and ensure that your investment continues to pay off through consistent operation, periodic cleaning is imperative. It provides peace of mind that you are inhaling high-quality air while preserving the delicate components of your nebulizer diffuser that might otherwise be compromised by neglect.
2.Potential Risks of Using an Unclean Nebulizer Diffuser
Regular maintenance of your nebulizer diffuser is not only a question of efficiency but also one of safety. Failing to clean this device can lead to several potential risks that may compromise your health and the functionality of the diffuser itself. Bacteria and mold growth within the system are primary concerns, as these can easily become aerosolized and inhaled, potentially causing respiratory infections or allergic reactions.
Moreover, over time, essential oils can build up and leave residues that interfere with the normal operation of the diffuser. This accumulation may affect the mist output, leading to reduced effectiveness in dispersal of oil particles into the air. In addition, sediment from mineral-rich water used in some devices can also accumulate and impede performance.
There’s also the unsavory possibility that a poorly maintained nebulizer diffuser could emit unpleasant odors instead of the desired fragrances, turning what should be a source of relaxation into an unwelcome distraction. In worst-case scenarios, significant neglect could cause permanent damage to the device’s internal components rendering it completely unusable.
When to Clean Your Nebulizer Diffuser
1.Recommended frequency for routine cleaning.
Maintaining a regular cleaning schedule for your nebulizer diffuser is pivotal in ensuring its longevity and functionality. Adhering to a routine cleaning frequency helps prevent the buildup of oils, dust, and other debris that can impair the device’s efficiency.
Typically, it is recommended that you clean your nebulizer diffuser after every use to avoid oil clogs and residue. However, if this is not feasible due to frequent usage or time constraints, aiming for a thorough cleaning at least once a week is advisable. This schedule could vary depending on how often you use your diffuser; more frequent use necessitates more regular cleaning.
2.Signs That Indicate Your Diffuser Needs Cleaning
One clear sign is a noticeable decrease in output; if your diffuser is producing less mist than usual, it’s likely that oil residues or mineral deposits are clogging its components. An unusual noise during operation can also be an indicator, suggesting that internal elements might be struggling due to built-up debris.
Additionally, if there is an unpleasant odor emanating from the diffuser or if the aroma of the essential oils has changed, this can be attributed to old residue affecting the scent. Visual inspections can reveal grime accumulation or discoloration on parts of the device, which calls for immediate attention to avoid potential malfunctions.
Lastly, adhering to a regular maintenance schedule ensures optimal performance but if you’ve missed routine cleanings and it’s been longer than recommended by the manufacturer, then it would certainly benefit from a cleaning session. Recognizing these signals will not only extend the life of your diffuser but also ensure that it continues to provide the best aromatic experience possible.
Does Vinegar Clean Diffusers?
Vinegar is well-known for its natural cleaning properties, making it a versatile and effective solution for cleaning a range of household items—including nebulizer diffusers. Its acidic nature allows vinegar to break down oils and residues that commonly accumulate in diffusers, without the need for harsh chemicals. For nebulizer diffusers, using vinegar can help remove oil clogs and restore optimal functionality.
To clean a nebulizer diffuser with vinegar, start by filling the reservoir with equal parts of water and white vinegar. Let this mixture sit for at least 30 minutes to loosen any stubborn deposits. Afterward, you should empty the reservoir and scrub gently with a soft brush if accessible areas show visible grime. For components that are directly in contact with essential oils or come with fine openings—like the nebulizing mechanism itself—a soak in a vinegar solution followed by a careful rinse with warm water often does the trick.
Vinegar not only targets the buildup but also acts as a disinfectant. This makes it particularly helpful in negating potential bacterial growth that can occur from lingering moisture or leftover organic material from essential oils.
However, it’s worth noting that one should consult their nebulizer diffuser’s manufacturer guidelines before proceeding, as some materials may have specific cleaning instructions or substance restrictions to prevent damage. Furthermore, thorough rinsing post-vinegar treatment is crucial to ensure no residual acetic acid remains which could inadvertently mix with essential oils during future use.
The Easiest Way to Clean a Diffuser
To begin, fill the diffuser’s reservoir with clean water, ideally distilled to avoid mineral buildup; then add a small amount of mild dish soap. Run the diffuser for about five minutes so that the soapy water can loosen any residue within the system. Afterward, empty the reservoir and use a soft brush or a cloth to gently wipe away any remaining deposits, especially targeting areas where oils tend to accumulate.
For an even simpler cleaning method, some users prefer using white vinegar, which acts as a natural disinfectant. Mix one part white vinegar with one part water and fill the reservoir halfway. Allow this solution to run through the diffuser for about five minutes as well, then drain and simply rinse with clean water.
Both methods will effectively clean your nebulizer diffuser without demanding extensive labor or specialized equipment. Ensuring you perform these steps regularly will significantly reduce any complications linked to using an unclean unit and keep your nebulizer diffuser in prime working condition.
In conclusion
In conclusion, maintaining the cleanliness of your nebulizer diffuser is essential for ensuring optimal performance, longevity of the device, and the purity of the aromatherapy experience. By following the straightforward steps outlined in this article—from disassembling and rinsing to disinfecting and drying—you can preserve your device’s effectiveness and enjoy the therapeutic benefits of essential oils without interruption. Regular cleaning not only contributes to a hygienic environment but also enhances your overall wellness routine.
Ready to elevate your aromatherapy journey with a well-maintained nebulizer diffuser? Visit our website for an extensive range of products designed to enrich your personal or professional space with the essence of nature. Our experts are on hand to provide tailored advice, ensuring you select the perfect diffuser that aligns with your needs. Don’t let maintenance woes hinder your aromatic indulgence—contact us today, and let us help you diffuse with confidence and clarity.